Garden Tour: Maximizing the Design for a Small Space
Amanda’s backyard was designed with precision. There isn’t a ton of extra space on this Bellemeade lot; every inch was accounted for. There’s a boxwood knot garden at the sophisticated entrance, a pickleball court for the teenagers, wild natives and structured shrubs around the pool, and a large lawn off to the side that provides that essential “rest for the eyes.”
But when Amanda invited TKG over for a consultation, she knew she was missing a kitchen garden. She had a wonderfully quaint Hartley Botanic greenhouse just off the patio, and to the right of it, an empty gravel space. Ready for raised beds.

Amanda’s family loved to cook, and they couldn’t wait to grow their own vegetables, but they had just moved from the New York City, and they had no clue how to get started. “Can we grow citrus here? Can we grow microgreens?” Well, yes… but let me explain. How about let’s get started with the garden?
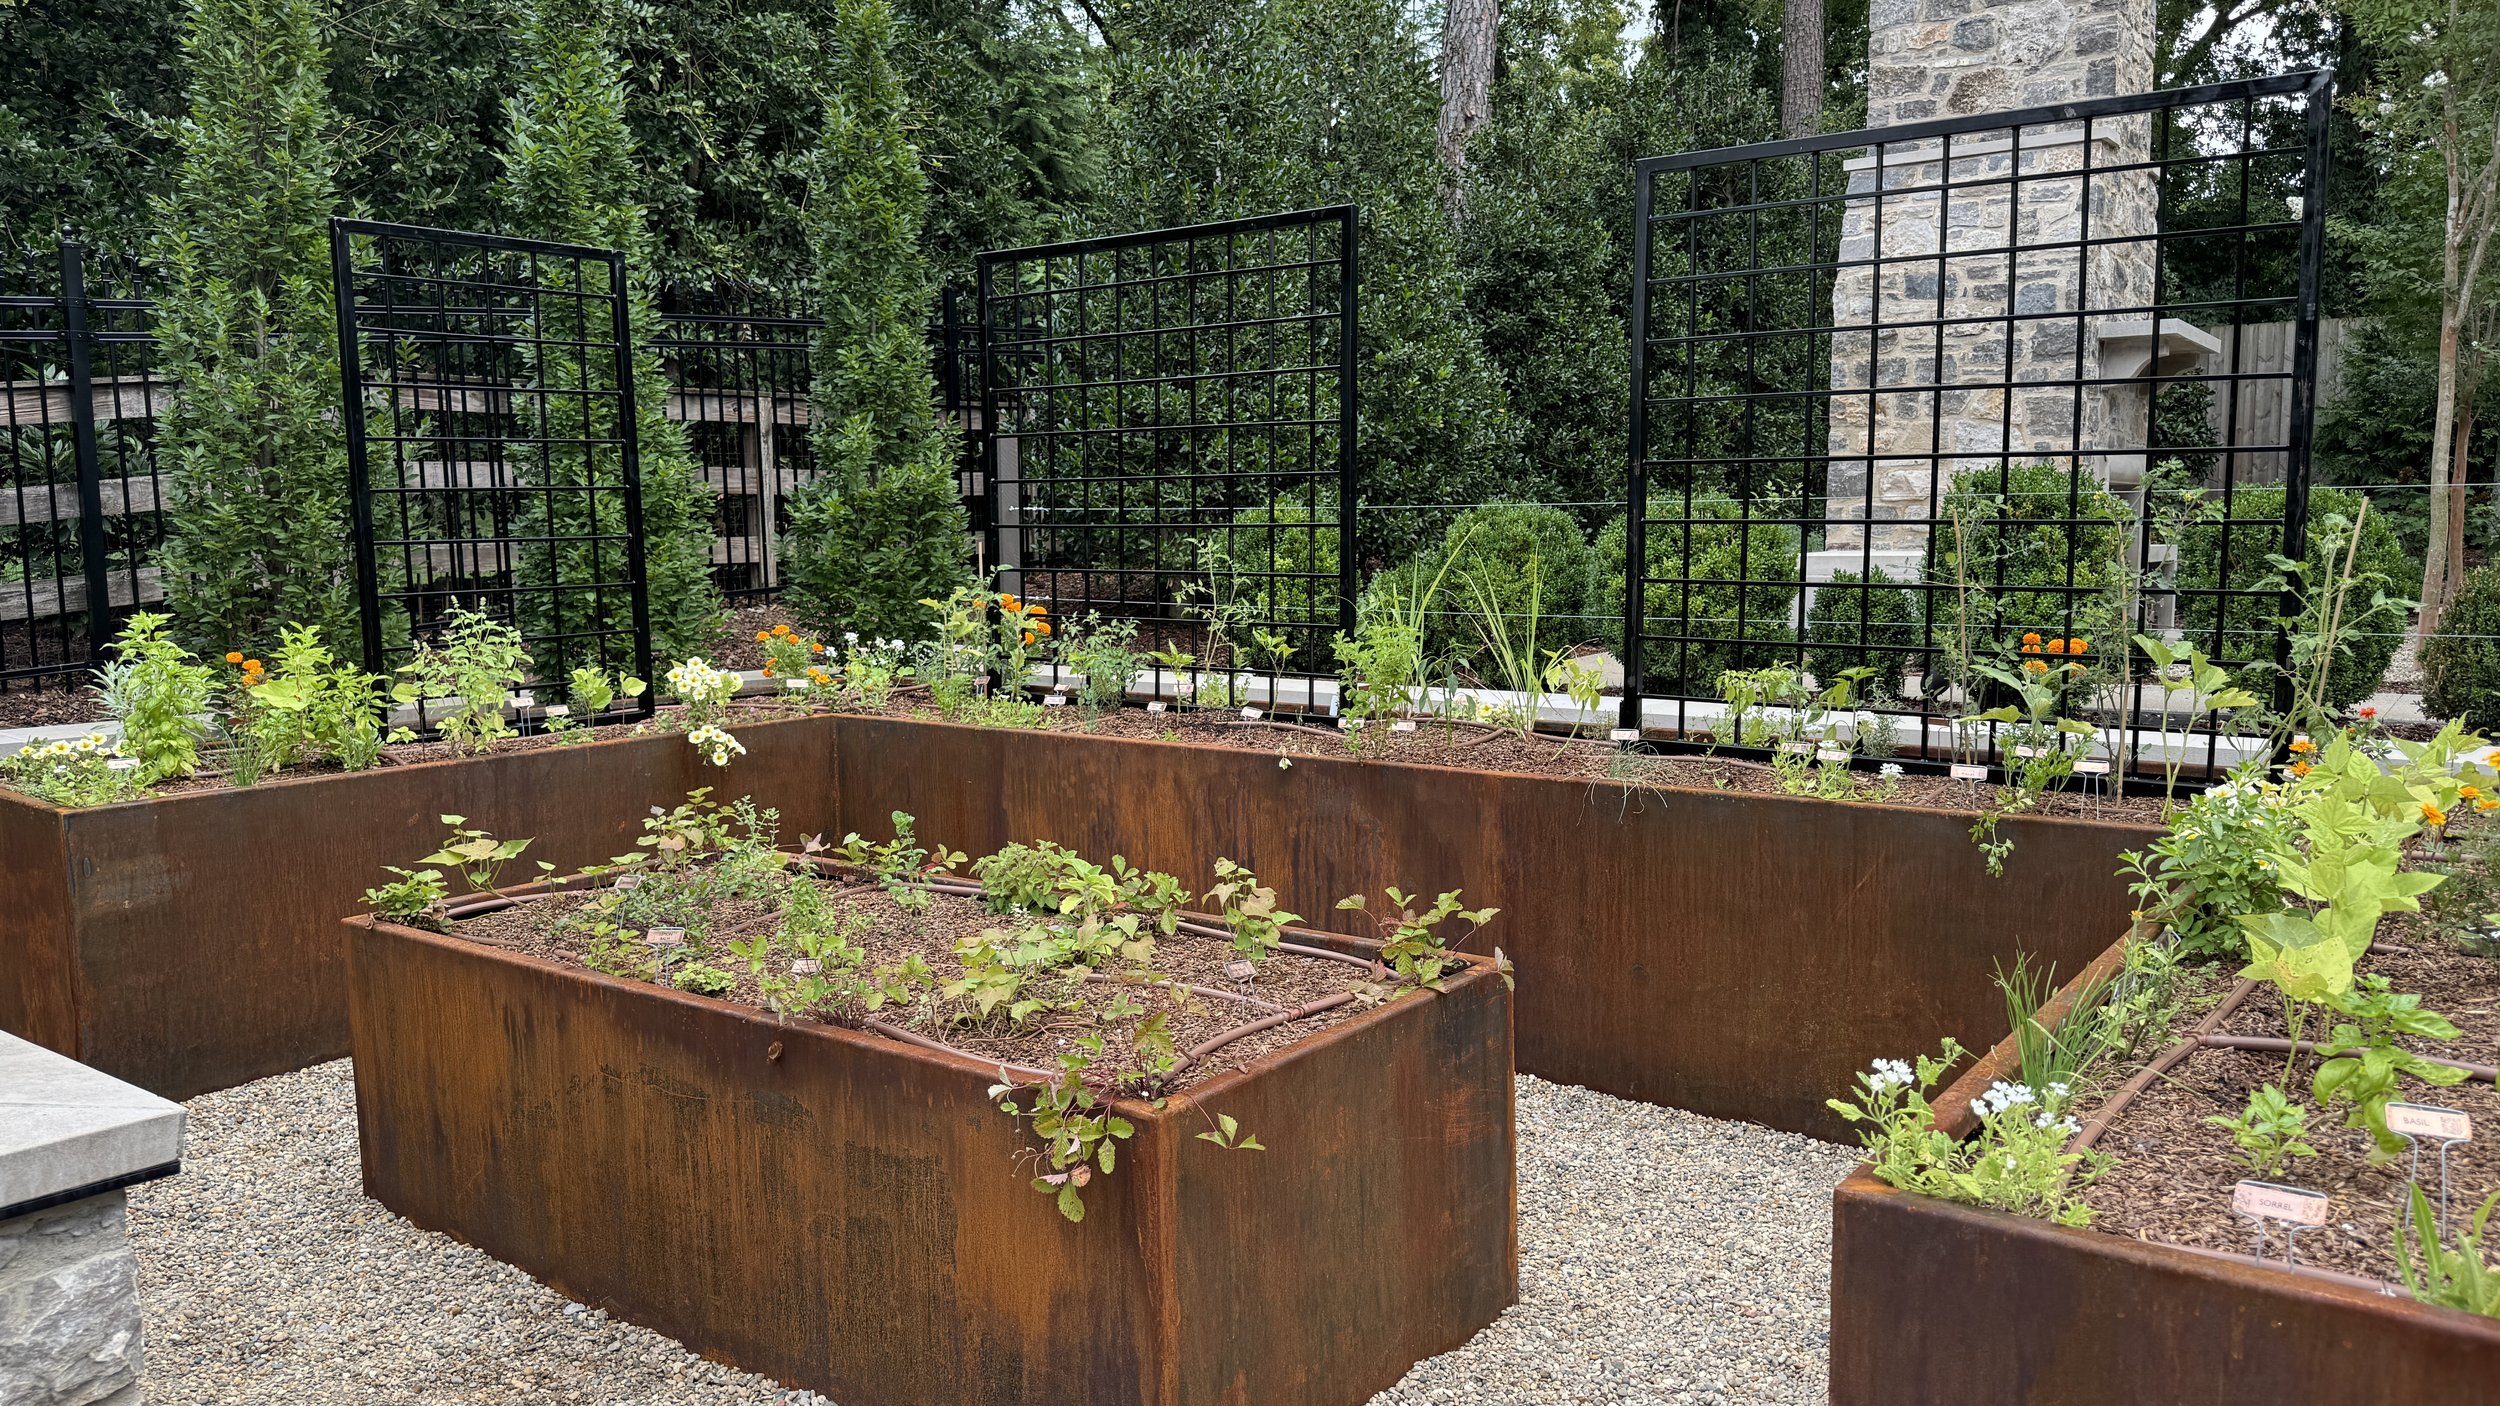
The gravel space measured 25 ft long by 16 ft wide, and seemed like the perfect place to put three narrow boxes, a design we call “the trio.” But what verticals would we use? Arches across a trio remind me of McDonalds (can you visualize it?) And then, there is the issue of access— three boxes means five pathways— that is a lot of walking as a gardener weeds and waters! So I got out my graph paper and pencils and started drawing— how could I use as much of the space as possible, and reduce the need to meander through the gravel as I prune tomatoes?

Brainstorming the design
And then I remembered the keyhole design. It’s a design commonly used in veggie gardening. In the practical garden, it’s crafted around a central compost bin so that a gardener can throw food and plant scraps into the center and the nutrients will spread throughout. I loved the design, but I needed it to be beautiful, too.
So I got out my graph paper and pens, and I stretched the bed long to cover the full space, then we considered the materials. Amanda’s entire backyard was stone and gray gravel, so we knew that more stone would be “extra,” as the kids say. Instead, we considered cedar or corten (weathered) steel, and ultimately, the Corten made more sense. This steel comes in long roofing panels, and we could weld large sheets rather than piece together cedar boards. We put in the request, and our welder, Dave, added braces throughout the 10 ft length to prevent bowing from the weight of soil. Our keyhole took shape.

The center bed you see in the photo adds an additional 32 square feet of planting space, and it's convenient in that the gardener only needs to turn around in order to harvest from one bed or the other. In that center bed, we chose to place aggressive herbs: various mints + a perimeter of strawberries. It's always nice to reserve a spot for herbs that need to be contained.
When the soil was in, we shifted our sights to the flower beds around the kitchen garden. There was just enough space to add a row of eight blueberries and 6 raspberry canes. We chose varieties that will ripen throughout the summer so that Amanda's family will have a sweet surprise on many a summer morning.

The last step was the addition of vertical panels. For this garden, we decided to add upright "window pane" style panels to support the cucumbers, tomatoes and beans. They will wrap around two of the three sides of the garden to keep the space open and visible from the house.
Our September plan: get that greenhouse in operation. It's too beautiful to sit empty! Stay tuned!